 Namaste, dear readers. Today's post is about LTSP, better known as the Linux Terminal Server Project. Installing this puppy was a breeze, so I'll try to keep the details short and refer to LTSP's own documentation wherever possible and necessary. I don't expect any major differences installing this on Fedora 11 either, so do go ahead and give it a try.
But first... Why would you want to install LTSP? Well, let's say you have a bucketload of old hardware lying around doing nothing. Or maybe you bought a nice diskless thin client at some computer event, thinking it would be a good idea at the time, but that is now steadfastly gathering dust in the corner of a cupboard somewhere. And let's say you want to make it possible for more than one person to log in to your home computer (running Fedora 10 or some other *nix) at a time. Well then a terminal server might be just what the doctor ordered.
Another cool use case is if you have a computer with an OS that stops working for some reason: Simply get it to PXE boot (boot from the network) instead of booting from it's own hard drive, and you will have a working workspace at your disposal on the "broken" machine within about a minute.
LTSP uses DHCP to boot a minimal linux kernel over the network. The kernel then starts on the thin client, and brings up the necessary subsystems on the thin client, namely: The screen, keyboard and mouse. It then presents the user with a tidy login screen (which you can of course customize) and when the user logs in on the thin client, a connection is made to the "server" via ssh (so it's secure, too - at least as far as network eavesdropping is concerned) through which all the data is then transferred between client and server. Bottom line is: Your thin client only needs to have enough power to display the screen, and process keyboard and mouse activity. All the behind the scenes processing and number crunching is done on the server.
Using LTSP then, you can use a wide array of miscellaneous hardware and breathe new life into it by making it act as a simple terminal.
Installation, as I said before, was a breeze:
For an absolutely comprehensive installation guide and manual, have a look at:
http://www.ltsp.org/~sbalneav/LTSPManual.html
Which contains instructions for not only Fedora, but Ubuntu as well.
Follow the procedure described in the url listed above and the basic install will be complete.
In my case, I ran into only a few deviations from the procedure above, all of which I could easily modify after performing the installation as described by the guide.
1. I don't want to have the LTS on a separate network, or bridged network, I just want it to reside on my main network, so that if I have visitors or guests, they can easily boot into the LTS without having to make any special changes or connections. To make sure that LTS listens for connections on your default network, be sure to check the file
/etc/ltsp/ltsp-server.conf
And make sure that the variable "LTSP_DEV" is uncommented and set to the desired network interface (in most cases, this should be eth0, as in: "LTSP_DEV=eth0".
2. The computer that I run which doubles as an LTP server has it's ssh daemon on a non-standard port. Since LTS uses SSH to connect, it will fail unless you specify the variable "SSH_OVERRIDE_PORT=xxxxx" in the file
/var/lib/tftpboot/ltsp/i386/lts.conf
Where "xxxx", of course, is the port number that your SSH server listens on.
3. You need to supply your DHCP server with a few extra parameters so that PXE boot will cause LTSP to query the correct server upon starting up. The syntax may vary between different DHCP implementations, but the options I added were: "root-path" followed by the nfs share which contained the LTSP filesystem which the thin client needs on boot, "filename" followed by the name of the pxelinux file and finally "next-server" which contains the ip address of the server that will serve up the boot images (kernel) to the thin client.
And really, that's all I needed to do.
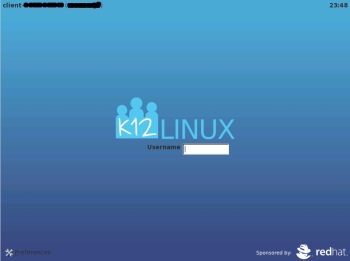
Now I can network boot on my network and within a minute am greeted by the LTSP login screen.
I hope this is of some use to somebody. I kept the details sparse because, really, the ltsp's own documentation is so good, I don't think I could improve on it! Refreshing to see good documentation for a project from time to time.
Until next time, possums.
Tux lives!